When you pick up an aircraft after maintenance or repair you are a test pilot, so act like one
As I write this, my employer’s A36 Bonanza has been in the shop for almost 5 months. We removed its nearly 1900-hour first-run IO-550 engine and shipped it out for overhaul; however, the proposed three-week job was drawn out, in large part due to nearly 40 per cent of the engine overhauler’s workforce being out sick with COVID-19.
During the downtime, the aeroplane’s annual inspection came due and was completed except for the engine inspections; now the engine installation will soon be complete and the remainder of the inspection will be completed and endorsed. It’s time for me to put together my post-maintenance test plan.
We read about pilots who pick an aeroplane up after an annual inspection, avionics installation, major repair or even an event as simple as an oil change, only to encounter a dangerous situation (or even crash) soon after taking off.
Anything that opens up an aeroplane or engine is at least minor surgery. Anything that changes components or hoses or makes adjustments to aircraft systems, has the potential to create problems that need detection before taking the aeroplane away from the shop. Any trip for repair work that includes modification to the aeroplane or engine, or that removes one item and replaces it with another, is major surgery, requiring significant inspection and testing. Engine or fuel system work is the aeronautical equivalent of heart surgery.
Returning an aeroplane to service after it’s been in the shop is a partnership between the engineers that did the work, registered operator of the aircraft and the pilots who verify it before and during flight. Regardless of why the aeroplane was in the shop, these are common elements to your post-maintenance test plan.
Be prepared
The first element of your post-maintenance test plan is to arrive prepared to serve as a production test pilot; this does not mean going beyond the flight envelope of the aircraft. Often maintenance, modification and repair events take weeks or even months to complete. You don’t want your first time in the pilot’s seat in weeks or months to be when you take off on a test flight.
Show up current and proficient. If you can’t get some flying in a similar aeroplane shortly before accepting yours from the shop, get someone else to do the flying. Or hire a qualified instructor to come with you on the initial test.
Be patient
Be patient when you accept an aeroplane from maintenance. Do not make plans to fly it anywhere that same day – hopefully you’ll be home on schedule, but you can’t count on it. The aircraft may not have required a proving flight as a result of the maintenance, so expect that you will be the one who will do the first flight; schedule accordingly and be patient with the process.
Be conservative
Wait for the right conditions. You want good, visual weather with light winds (or at the very least, a low crosswind component) for your post-maintenance tests. Wait until the weather is very good before conducting a test flight. Think of what you would want the weather to be like if you got into the air and had instrument failure, a partial power loss or some other emergency as an unintended consequence of the maintenance, modification or repair event. That’s the weather to wait for.
Be meticulous
As pilot in command, do not relax your normal high standards of pre-flight checks, be extra vigilant. Accepting the aeroplane from a maintenance organisation should not change your own pre-flight processes and procedures – again, it’s a partnership and you should play your part.
One of the first things we learn about aeroplanes is the documentation required for flight. Ensure the required documents are in the aircraft: airworthiness certificate, registration, flight manual, weight and balance/equipment list information, maintenance release. If there are new flight manual supplements as a result of modifications or new avionics installations, they may contain revised limitations, so they are required to be onboard. A statement that a new installation or removal of some item has a ‘negligible’ impact on the aeroplane’s weight and balance, if that’s the case, is still a required update that must be done before flight.
Engine or fuel system work is the aeronautical equivalent of heart surgery.
Further, all required logbook entries must be complete. The record of inspection, maintenance or repair including the technician, inspector or installer’s signature and statement that the aeroplane is airworthy must be in the logbook. It’s definitely not acceptable for the shop to tell you to fly it on home and they’ll mail you a logbook sticker later. Review the required documents and endorsements meticulously and do not fly the aeroplane – even a short test flight – until it has been properly endorsed as airworthy in the applicable logbooks. If something goes wrong (and remember, this is a test flight), you may face insurance issues and pilot certificate action if you knowingly flew an aircraft that did not meet all the requirements for airworthiness.

Be thorough
Be extremely thorough on your pre-flight inspection. Turn off your mobile phone. Unless you are inspecting the aeroplane with the LAME, perform your inspection with no-one else around. Don’t watch other aeroplanes fly or taxi by. Eliminate as many distractions as possible and focus all your attention on the aircraft.
Include type-specific items that are in the flight manual but may not be common knowledge to persons or instructors who do not fly the type. Check that cabin interior items like fuel selector handles, alternate landing gear extension systems in retractable gear aeroplanes and other switches and controls are set properly, easily accessible and able to move without being limited by the aeroplane’s interior upholstery.
Move the flight controls through their entire range of motion and check that movement outside is matched by proper movement of the control wheel or stick inside. Check all the exterior and interior lights. Set the trim tabs to zero in the cockpit and check they are flush with the control surface as you do your exterior walk around. Check everything for leaks, security and general condition. Open the cowling(s) and inspect the entire engine compartment. Get up under the nose and wings and closely inspect the landing gear.
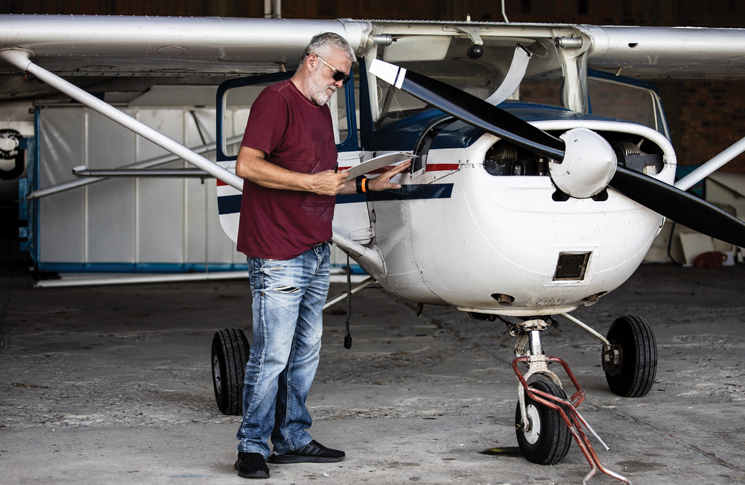
In short, conduct your pre-flight inspection like you were being watched by a flight training examiner for an assessment.
Inspect one part of the aeroplane, for example the right wing, then stop and use the flight manual pre-flight inspection checklist to confirm you have not missed anything. Then move on to the next part. More importantly, focus on the aeroplane, not the checklist or anything else going on around you. If this sounds like it will take a lot of time, you’re right. It’s time very well spent.
Be sceptical
During your inspection and when you fly, expect to find things that are wrong. Make the aeroplane prove to you it is airworthy.
Aeroplanes are complex things and sometimes working on one part can cause collateral damage to another part. As aviation author Paul Berge recently wrote on AVWeb, ‘Every action in aircraft ownership causes an equal and unforeseen reaction.’ Most of the time the engineers will detect this and fix it. But engineers are people too, subject to the same human factors as pilots.
Approach your entire acceptance process with scepticism, checking everything you can to make sure the aeroplane is airworthy and ready to take home.
Conduct your pre-flight inspection like you were being watched by a flight training examiner for an assessment
Be methodical
Put together a test plan that methodically checks the aeroplane. If the engine compartment was touched during maintenance, after your pre-flight inspection you might want to start the engine(s), run for a minute or 2 to ensure all engine instrument indications are as expected, then shut it down and do another engine compartment leak check.
Assuming it passes, take the aeroplane up for a short hop, orbiting high above and within glide range of the airfield for 20 or 30 minutes, watching all indications. While you’re up there, check the avionics, autopilot, instruments and the subsystems for proper operation – make yourself a checklist beforehand so you don’t forget anything. Land and do another leak check and another thorough pre-flight-style inspection.
If all is good, you can fly home. But do so in day, visual conditions, alone or with your instructor as the only ones onboard, doublechecking indications and system operation along the way. Think of the first flight away from the aerodrome as a shakedown cruise.
Be assertive
The engineer wants your aeroplane to be airworthy as much as you do. But, if either of you begin to become complacent – especially if there’s some nagging issue that you’ve not yet been able to get cleared up – assert your authority and responsibility as owner and pilot-in-command to ensure the aeroplane is fully airworthy before you take it away.
Sometimes you might need to wait overnight to approach the problem together with fresh energy. As PIC, you play a very important role working with the maintenance organisation and registered operator of the aircraft to ensure the aircraft is airworthy.
One experience
Many years ago, I was flying and managing a pair of Beech Barons for a construction firm. One Baron developed an attitude indicator problem – the pneumatic pumps were putting out pressure, so we expected the failure was in the gyroscopic instrument itself. The failure happened at one of our usual destinations where we had some of our avionics work done. So, I checked it in for repair, hired a rental car and drove the 4 hours home.
Assert your authority and responsibility as owner and pilot-in-command to ensure the aeroplane is fully airworthy before you take it away.
A few days later, the shop told me the aeroplane was ready. The afternoon before I drove back down, my employer’s senior civil engineer asked if I could get the aeroplane back in time to pick him up and fly him to a meeting, saving him a three-hour drive. I told him sure – I’d drive down early enough to get him there on schedule.
Arriving in time for the shop to open (I did a lot of very early trips back then), it took over an hour to get the logbook entries made and signed. Finally, all was complete. I paid the invoice and they towed the Baron out onto the ramp. I started engines but the attitude indicator still wobbled horribly.
After some time in discussion with the director of maintenance, they agreed to take another look. However, by this time I had to call the company engineer and tell him to drive to his meeting. As it turned out the indicator was fine; the shop eventually found a clogged instrument air filter behind the panel that was restricting air flow to the gyroscope. But they had not checked and I ended up having to stay overnight for the aeroplane to be ready to fly home.
Don’t put yourself or the aviation engineers under pressure, or back yourself into a corner, by planning to use the aeroplane on the same day you accept it from the shop.
Be a partner
Returning an aircraft to service is a team effort between technicians and installers, pilots and aeroplane owners. It should be approached as the serious test flying that it is, and given time and planning as a process, not an event. It’s going to take time and possibly a push back into the maintenance hangar before the aeroplane is ready to fly away home. Have a post-maintenance test plan, including paperwork, inspections and flight, to manage your aircraft’s return to service.


Comments are closed.